Tuesday, January 31, 2017

Every Knight needs his Steed

For my final post for January, I made this Knight card for the Cards And More Challenge, "Pets & Furry Friends", with this digi from Dr. Digi.


I knew I wanted to make the horse a Palomino, and was able to get the body color pretty easily, but the mane and tail were giving me fits! I think I finally got it to my liking! My son was quick to point out that I should have made the saddle-blanket red and yellow to match the lance, but it was too late, and I was DONE!


 Of course I used my Wink of Stella to make the armor actually "Shine" for the Shining Armor comment. It's hard to see in the pictures, but looks really cute in real life. The banner with the sentiment was printed, then cut with the paper-trimmer and the fish-tail cut with the Banner Punch from Stampin' Up. After putting the mat on it, I attached this sentiment banner with foam tape.


I placed the card-front on a pre-made card-base from Hobby Lobby. I just really liked the colors together, and it made things just a little bit easier. Of course, I did have to use temporary adhesive to attach the card-base to another piece of full card stock so it would properly go through the printer. Overall, I think it turned out super-cute!

Head on over to Cards and More Challenge Blog to see what the other designers came up with for this challenge, and I'd love to see your comments--let me know if you think the blue saddle-blanket is too out of place!


Sunday, January 29, 2017

Mommy & Me Card-Making - "Rawr Means You're Awesome!"


I'd like to introduce my 5 year old son, Leroy (his nickname). He's quite the little handful, but always wants to make cards with me, so of course, I share my passion with him whenever I can! I even made him this project apron for whenever he helps me cook or does art--he's awfully proud of it, can you tell??


So today we decided to make a dinosaur card, because what 5 year old boy doesn't like dino's?!  We fiddled around for a while trying to figure out how to best put it together, and I then I was left to have to fussy-cut the mask in order to make it come together right.  Little Sneak even got a picture of me doing it!!
  We started by stamping the first dino, then masking it, and masking the hills we wanted to do. He liked "painting" with the ink and sponges. The lower hill was done with CTMH Topiary, the upper hill with CTMH Sweet Leaf. Thank Heavens for scrap paper on the table, BTW!!


Making cards with a 5 year old isn't the easiest thing in the world, let me tell you! But it IS possible, thanks in large part to my   MISTI!


  He re-inked and "closed the book" several times to get a nice even and dark color for each dinosaur, then the same thing with the brown spots on each critter. He chose all the colors, with some guidance from me: Hello Honey, Only Orange, and Lost Lagoon, plus Soft Suede for the dots, all from Stampin' Up.


    We used the MISTI to ink the Sentiment as well, using Black, Versafine Ink, then embossed with Clear embossing powder--I did the heat tool action, BTW! I then placed the die-frame and stuck it in place using a piece of washi-tape, and let him run it through the Cuttlebug. I didn't quite like the way it was looking, so I matted this piece on black and fussy-cut around the shape to give it a small black outline.  I also used the paper-trimmer to cut off the sides so it would fit on the card without covering too much of the design.


I still wasn't completely happy with it so we went back to the MISTI and added the branches at the top. I added the grass on the right by hand with my Copics, and the eyes with a Micron Pen. Leroy picked the background paper from one of the paper pads I've gotten for him: Paper Studio's Woodland Retreat.  He's so proud of how it turned out, and that (at least as far as he's concerned) he made it himself! 

Not a bad way to spend a Sunday afternoon!   

Leroy would love to know you enjoyed our blog post, by leaving a comment below!


Saturday, January 28, 2017

Enchanted Greetings from a Fairy

Check out this adorable little Fairy!!


The Saturday's sketch over at Sketch Saturday was a little bit of a challenge for me. The design is rather different from what I usually do. I generally like things straight, and would do the border at the top and bottom all the way across. So I had to stretch my creativity a bit!

Our designer for the challenge was A Day For Daisies.   Most all of her images just cried out to be done with water colors! I used my Zig Clean Color Markers, and finished off the wings and her hair with some Wink of Stella sparkles!   Unfortunately, I had a little by the fairy's wing, so had to add the tiny white sequins to at least cover the worst of the smudge.


 The small sentiment is from the Vintage Affections collections from Little Darlings Rubber Stamps. I stamped it using black Versafine ink, and embossed with clear embossing powder. I used a paper-trimmer to cut the banner down very thin so it would look appropriately dainty to match with the dainty little fairy. I added just a little bit of Antique Linen Distress Ink on the edges, then matted it on the pale pink paper. Thank goodness for the Mini Perfect Layers tool so I could cut the matting down to 1/16 of an inch around. The fish-tail I cut by hand, which is a big feat for me!!


 I printed the inside sentiment on the computer--which I usually find to be the easiest way.

Thanks for looking! Please leave a comment!! :-)  
And of course, don't forget to check out Sketch Saturday!!


Monday, January 23, 2017

Playful Kitty

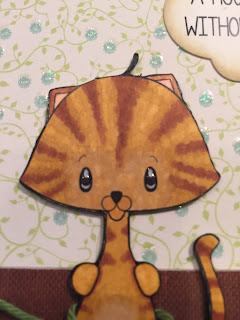
These adorable kittens from Scrap N Dipity are bringing joy to people by the simple act of receiving them!

I made this first one for a friend who recently got a new kitty!  


 I liked the images so much that I made a second card with them--I think this one looks even cuter, and I like the sentiment better, as well.


I tried to make the background look a little like a wall and floor--but I don't have some of the great scene-building pieces that are available, so I just made it "reminiscent" of a wall and floor. :-)

I used the Stippling method of coloring the kittens, which is doing a bunch of little dots. Perfectionist that I am, I don't feel they are perfect, but I still like them, and enjoyed making them!  I used Glossy Accents on their eyes to makes them sparkle. 


 The green crochet thread was wrapped around the orange kitten. I punched holes on either side of the moth of the grey kitten, and ran the thread through the wholes to make it look like the kitten had the thread in it's mouth. I think this effect turned out so cute! 

And just in case you're wondering: Yes, the background was made with scraps!

Saturday, January 21, 2017

Friends are a Treasure!

I just LOVE this adorable digi from DigiStamp Boutique! And I'm not usually a cutesy, pinky girl, but this one called to me. Please go to Sketch Saturday and join the challenge over there as well--that's where this sketch is from!


 The sketch was fairly simple and in fact, I had to brain storm a bit, because I didn't want this card to just look like all my other cards.  I think making the bear an insert, with the patterned paper a raised frame really does a lot to set this card apart!

 
Of course that pretty lace around the oval die-cut isn't too shabby either, IMO!! As you may recall, I'm on a "Use my Scrap-Stash" binge and trying my darndest to not use any new/whole papers. So! The pink patterned paper was a large scrap from who knows where or when! And the slightly glittery pink paper was also a scrap--SCORE!


 This little felt flower and itty-bitty button were the perfect accent!

The interior sentiment is from MSE (My Sentiments Exactly) and was actually a rub-on that they sent me as a thank you for ordering the stamp set.


Thanks for your time and don't forget to check out Sketch Saturday and the blogs of our other fabulous designers!


Saturday, January 14, 2017

Hopping By to Say Hi!

Third Design Team is now set: Scrap N Dipty!  YAY!! She has some really cute digi-stamps available and there is a Challenge on the 15th of each month.

So! Here is my first entry for the Scrap N Dipty January Challenge: Monochromatic.


I chose to use the Pile of Frogs digi-stamp, coloring it with Copic markers G07, YG09, YG06 & YG 13, plus Spectrum Noir PP1 for the cheeks. I used my brand new Brother Scan N Cut to cut out the frogs stamp. To make the cut-out look more complete, I went around the outside of the cut-out with a black marker, which unfortunately I messed up a couple of times. But by going over it with the YG13, I was able to blend them back in to where they aren't very noticeable!

The frame was cut using the Gina Marie Designs Wonky Stitches dies, and I just used an exactly blade to cut out the inside of the frame. The black border-frame was cut with my Cricut.

All the patterned papers are from my stash, so I don't know who made them. Hooray for using more scraps!!

I did not have a stamp that said anything I wanted, so I printed from my computer. A bit of a challenge, but it got what I wanted, where I wanted it! I also printed the inside, rather than using stamps there.

The items inside the shaker are Chunky Glitter from Recollections and some spare sequins from different places.  The acetate I used is actually recycled from the back of a stamp-set! And I used the thicker, 1/8" thick 3M foam tape as the dimensional, using my rotary cutter to make it thin enough to not show behind the frame.


Thanks for looking, and don't forget to check out  Scrap N Dipty for their challenges and products.

Happy Birthday, Little Monkey!


Thanks for checking out my Sock Monkey Creation for the Saturday Sketch Blog.  This is actually my second creation for this sketch! I made the Valentines Day card shown at the bottom, but when I went to upload it for the challenge, someone else had seen the same potential as I had and our cards felt awfully similar. So I decided to make another one, with a Birthday Theme. 

  The sock monkey image is from Miss Tiina's designs--she has a bunch of super cute sock-monkey images. This one actually was holding a little sign hanging down that said "HELLO". I just received my Brother Scan N Cut yesterday, so rather than trying to figure out how to delete the sign from the image, I just printed it, and used the scan to cut feature and cut the image out--the string holding the sign was too narrow and just got cut right off.  I then punched the balloon and glued the string over the black line left on the sock-monkey's paw.

The image was colored with Copic and Spectrum Noir markers and glued to Recollections heavy-weight card stock paper.
The pennants were cut from scrap pieces of card stock, at 3/4" wide, then punched with the Stampin' Up Banner Punch. I really love this punch BTW, it can do several different sizes and fits great on a shelf! Each piece was folded over and glued over the thread, which wrapped around to the back of the patterned paper and tacked down with washi-tape. (It was further secured with the adhesive tape that attached that paper to the black matting.)

As usual, I chose to print my card base with a personalized message.


Here is the sketch and the card I originally did with a Valentine's day theme! I think this sock monkey holding the string of hearts is just perfect for the clothes-line of hearts behind it!


Please leave a comment so I know you were here, and head on over to Sketch Saturday to see how everyone else used this week's great sketch!

Tuesday, January 10, 2017

Boy Scouts Scrapbook Coverpage


I have set a goal for myself of completing 2 new layouts each month... and posting them on my blog as proof! Ha ha! However, I'm not starting real well, as I haven't been feeling well this weekend and so my first post of a LO is an older one and NOT fulfilling my goal of a NEW Layout. But it is one of my favorites, so I'll call it inspiration for future posts!

My older boy particiapted in Scouts for about 7 years and I was so very proud of him. The Scouting program did a lot to teach him confidence and good morals! We also were able to double dip, and use a lot of his scouting projects for Homeschool time--SCORE!

This layout is the front cover-page of one of his albums. It has a few more flowers and gem stones than he'd like, but trying to do that kind of look without any flowers or gems is a huge challenge! I am also proud that this LO is my own creation, and not from a kit or even a Pagemap! (Which I use often to help get the creative juices flowing!)


The star-burst shapes were cut using my Cricut, which also allowed me to write the words on the rays. I used the Print and Cut feature to make the "Boy Scout" title. But got frustrated before I was able to get it to write on the lines on the little journaling card I wanted to use--so that was actually done by hand! EEK!


The stitching was done by hand after using the stitch roller tool and I think it really adds to the overall look of the page. The papers and Scout-related paper-embellishments were all from  specialty paper packs, and I actually included his First Class Badge on the page, since he'd earned his Second Class Badge by the time I finished this page! (Go Bubba!!)

I'd love to hear if you've made Scout-related pages and how you managed to get around the common use of flowers in other layouts. (And BTW, I did ask his ScoutMaster permission to post his picture with this page!)

Tuesday, January 3, 2017

Happy Birthday, Party Animal!

Second Design Team: CHECK!! How exciting is this! Was just invited to join the Cards and More Challenge Blog Design Team --the website is linked to the side.

I'm not required to participate in this challenge yet, but thought I would anyway!  This week's challenge theme is "Party Animals" so this dog-birthday stamp seemed just perfect.

I have not been able to afford to go all-copic, much like many of you, I'm sure! So my coloring was done with a combination of Copics and Spectrum Noir markers. The dogs I actually colored to look like specific breeds of dogs, and most colors are actually a combination of at least 2 colors.

I did have a small smudge in the lower right hand corner from the stamping process. I used a white gel pen to lighten it up, then placed the orange sequin over it--None the wiser!


The black card-stock layers seem to be just the ticket to set off the 2 different panels.

I printed the interior of the card from my computer rather than stamping so that I could include the words "party animal".


 Be sure to head over to Cards And More to get in on the blog challenge!! (The site is in German, but has a Google Translate button on the right.)