Today I felt like continuing with the bright cheery colors,
and had so enjoyed the yellow ribbon on the Sunburst Card, that I wanted to use
it again as well. These 2-Step flower stamps are from Stampin’ Up! and have been in my stash for a long time, but
have never been used—until now!
I cut a base on Heavy White Recollections cardstock at 6.25" by 4.75", and cut a piece of scrap to 1.75" by 4.75" (I could've left it wider, but this was the extra off the original cut, so 4.75 will be just fine.) I lined these up in my MISTI with the scrap as a mask at the bottom of the white base.
For the background colors, I used my MISTI, and inked each stamp a couple of times to get a nice bright impression. I had separated the flowers from the stems, so I could ink those individually, and the MISTI made this process easier as well.
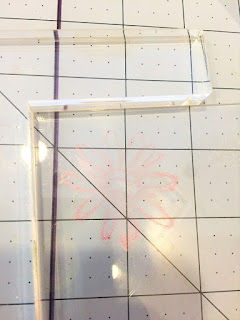
For the second step of the stamps, I used my Stamp Position-er. Now that I know how useful this tool is, I will definitely be upgrading to the Stampin' Up! Stamp-A-Ma-Jig! You just place the plastic sheet over your project, line up the stamp-block in the corner of the positioner and make an impression.
Then you use the clear plastic sheet to line up exactly where you want the stamp, place the positioner, and remove the plastic sheet. Then when you line up your stamp again with the positioner, it stamps right where you already decided you want the stamp!
Now on this set of stamps, its not quite as important, because they're of an abstract nature. But I'm so OCD that I got frustrated trying to do this without the Positioner. TIP: I did find that I might accidentally move the base when removing the plastic sheet, so I used a bit of Washi tape to hold my base piece in place. I free-hand stamped the little leaves.
I felt the card needed more color, so I used Ballet Blue (Sky Blue) to distress the edges of my base. And of course added my beloved yellow silk ribbon. I have also found that sequins cover a myriad of sins! So, one to cover an ink blotch and 2 more to make it look intentional! :-)
Did a second-impression Butterfly (meaning I stamped once on a scrap paper, then into my card) with Ballet Blue in the upper corner to add interest to the inside!
And I still didn't feel it was quite done, so I put a little bit of Wink of Stella in the center of the pink flower.
I am really loving these spring colors! This is my favorite season of the year!!


This is a great card, very "spring like". The sentiment on the front is perfect. :)
ReplyDeleteThank you so much!
ReplyDelete